
Congratulations on embarking on the journey of making your own baby food. There are some great books out there with beautiful recipes.
At Feeding My Kid, we have created an ultimate resource guide for making your own baby food that includes baby food recipes including fruit purees, veggie purees and a mixture of both fruit and veggies.
In this article, you will find everything you need to make your own baby food!
Also check out our ultimate guide to introducing solid foods to your baby. This is everything I wish someone had told me when I was introducing solid foods to my twins. It includes everything from how you know when your baby is ready for solids to understanding the different between gagging and choking to how much your baby should be eating.
Check Out More Baby Food Recipes Here:
- Making It Easier for Moms! Delicious Baby Food Recipes
- Your Ultimate Guide to Making and Storing Baby Food. Healthier and Budget-Friendly!
- Homemade, Delicious, and Nutritious Baby Food Recipes
Making Your Own Baby Food
For the most part, there is no need to buy specific baby food making supplies. You probably have all the essentials at home.
Here are a couple of ways to cook the food before you begin pureeing it, which includes:
- Steaming
- Stewing
- Oven Baking/Roasting
- Boiling
- Mashing raw foods
Tip: Before you get started, don’t forget to wash your hands. We can be so sleep deprived that we might forget about the 15 diapers we’ve changed today.
Also, check article about the pros and cons of making your own baby food.
Pureeing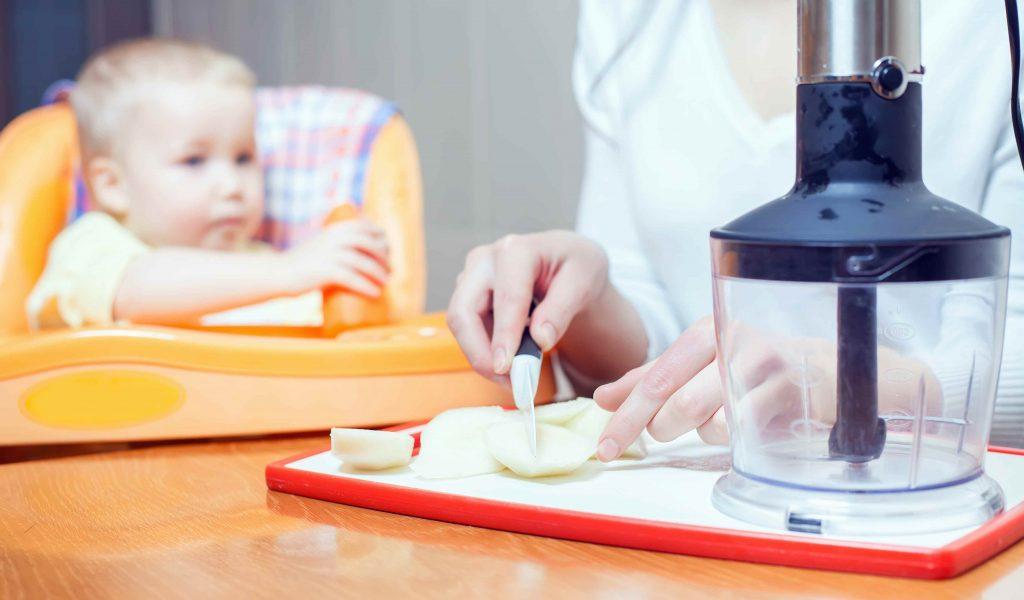
After you have cooked the food, here are the main items you’ll need to puree the food to get it to the right consistency and texture:
Consistency
Add expressed breast milk or formula to thin out the purees or cereals that you make, especially at first. Eventually, add less and less milk until your baby is fine with the consistency. You want your baby to get used to the taste of fruits and veggies without the milk/formula competing for flavor.
If the food you made is too dry or thick, you can also add some breast milk, formula and/or water to thin it out to the right consistency. Use the water that is left over from steaming or boiling your baby’s food as the nutrients that leach out of the food will be in the water.
To thin out the puree: You can also add more watery foods to your puree like a pear, apple, cucumber, or zucchini to add liquid to the puree combo to thin it out.
To thicken the puree: Beans, potatoes and butternut squash are great thickening agents if your puree is too runny. You can also add some rice cereal to thicken it up.
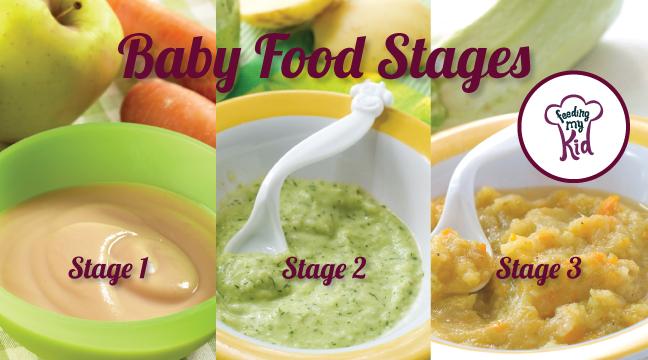
Understand Puree Texture and Baby Food Stages
There are three kinds of consistencies when it comes to pureed food. You’ve probably seen on commercially prepared baby food where it says Stage 1, Stage 2 and Stage 3 foods on the labels. That refers to the texture of the food.
Research shows babies who stay on thin purees too long can struggle transitioning with textures.
Stage 1 means the food is puréed until it is an ultra fine, almost watery texture. This preparation has the least amount of texture.
Stage 2 has more texture to the puree. This is where you will stop pureeing the food before it turns ultra fine.
Stage 3 generally has a lot more texture and/or food chunks in it.
My son and daughter never accepted Stage 3 foods, even though my twins would eat whole foods. I was following the recommendations on the jar of baby food, only to find out later that I should have transitioned my babies much sooner. See below for when to wean your child to each stage of food.
Each child is different and there is no need to go from Stage 1 to Stage 3 and then graduate to finger foods. You can start introducing finger foods (wholefoods) to your child as early as six months, which is also called baby-led weaning. Some kids have more of an issue with texture than others. See our complimentary article to understand texture aversions in kids.
Tip: The quicker you start introducing textures to your kids the less likely they are to have issues with textures later on. When you are making your own food, do not over-blend everything and offer a variety of textures for them to get them used to.
 Storing the Baby Food
After you’ve made the food, you need to store the food. You will need:
Check to make sure your containers are BPA free. It’s best to use glass storage containers for the refrigerator.
Freezing Baby Food
Babies eat so little, that when you make your own baby food, expect to have a lot left over. There is no need to make baby food every day. You can make a batch of food and then freeze the leftover food after you make it. Then you can just thaw the portion of food you need for that meal.
Tip: If you are going to add water or breast milk to thin out the consistency, add it after you unfreeze the food, not before.
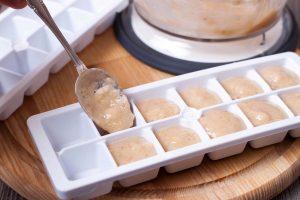
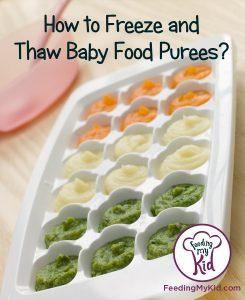 One of the best tools to use to freeze baby food are ice cube trays. It allows for you to put the perfect serving of food into each tray and it makes taking out the right serving super easy. It’s about one ounce (1 tablespoon) of food per ice cube.
You can buy a couple of ice cube trays and make a large variety of different foods. At first, doctors recommend you only introduce one new food at a time to look out for possible food allergies. Once you know individual foods are safe, you can start to combine the foods. You can thaw out different foods from each tray to serve your little one, for example broccoli from one tray and pears from another and combine. Bookmark these delicious Baby food recipes.
Tip: After cooking the food, you can let it cool before placing it in the ice trays or a different storage container. Do not put hot food in the freezer. You can put ice cubes under your container to speed up the cooling process. Not all ice cube trays are safe to use. Look for and use a tray that says #2, #4, or #5 on the bottom of the tray. You can also use a safe silicone or stainless steel tray, instead of plastic.
Baby Food Safety
 Don’t double dip. If your baby didn’t finish out the serving you gave him, don’t put it back in the refrigerator. Throw it out or eat it after your baby is done eating it. The bacteria from his or her mouth can get into the food and it can become unsafe to eat in just a few hours.
When feeding your baby, make sure you take out a small amount, generally only 1-2 tablespoons of food, and leave the rest in the refrigerator or freeze the rest. That’s why it’s a good idea to separate the food into separate dishes before serving the food to your baby.
I normally warmed up a larger serving and then put a small amount into a separate bowl to serve my baby with. I would use a clean spoon to add food from one bowl to the other ensuring I do not cross contaminate the food.
Don’t leave baby food out for more than 2 hours as harmful bacteria can start to grow. We recommend you make the food and put it in the refrigerator or freezing it shortly after making it.
How Long Can Baby Food Be In The Refrigerator?
Generally, you should only keep food in the refrigerator for about three days. That’s why it is recommended you make the baby food and freeze a large portion of it. This way you won’t have to make food every day and you will be able to take out the portion of food you need that day and heat it up. It also helps when you want to blend a variety of foods together. Check out our mega list of mix puree recipes.
Don’t Forget Foods That Don’t Require Cooking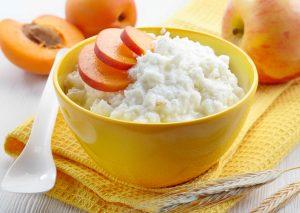
Some foods are so incredibly easy to make and do not require cooking or a lot of clean up. You can easily mash up a banana or avocado and that’s all you would have to do to make baby food. I used to mix avocado and banana together. Neither of my twins liked avocado much, but they did love banana. A lot of the baby food you can make doesn’t require cooking at all. Also, avocado isn’t available in jars or pouches so you’ll have to mash up your own.
How to Serve Your Baby Food to Your Baby
You can serve the food cold, room temperature and/or slightly warm. My twins still enjoy most of their food at room temperature. Be careful of serving food that is too warm. Babies are more sensitive to heat than we are.
Take out as much food from the freezer as you think your baby will eat over the next day or two. This way you can thaw out a few days worth of food in the refrigerator at once.
Tip: Don’t thaw food at room temperature. It can breed unsafe bacteria into the food.
Ways to Thaw Baby Food:
1. Refrigerate to thaw it. You can transfer the frozen food to a glass container with a lid and leave it in the refrigerator for at least 12 hours. It will go from frozen to refrigerator temperature.
2. Microwave it. Put only one serving into a microwave safe dish and heat for 15 seconds at a time and stir. This will help to prevent hot pockets in the food. Keep heating until the food reaches the desirable temperature. We always recommend using glass when heating any food up.
3. Heat in pan. You can place the food on a low temperature in a pan and heat it. Remember to mix the food well and test the temperature on the inside of your wrist. It shouldn’t feel cold or hot on your wrist.
4. Place in warm water. Heat some water and put the baby food in a bowl and put that bowl in the heated water. Think of it like nesting cups. Use a glass bowl and not a plastic bowl.
Tip: Do not refreeze baby food after you have thawed it. Also, do not reheat defrosted foods. If your baby doesn’t eat the food then throw the food out, eat it yourself, or add it to your smoothie.
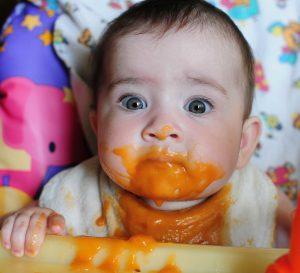
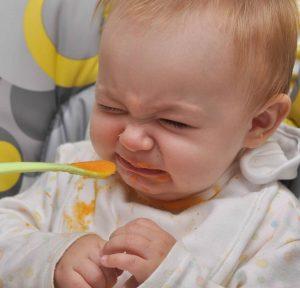 Don’t Fear The Face
It’s completely normal for babies to make a face when trying new food. You know what face I’m talking about! The face that tells you they hate the food. It’s completely normal! And, your baby doesn’t hate the food.
Don’t Beat Yourself Up If You Don’t Continue Making Baby Food
There is a lot of pressure we put on ourselves under for everything related to your baby. If you find that you are spending too much time making his food and you are not enjoying it, then don’t despair. There are some great organic and natural baby food options available. Personally, I couldn’t handle washing the blender all the time and I didn’t have the freezer space. Each family situation is different and your reasons for doing it or not doing it are your own and are right for your family!
I do look back and wish I had made my own baby food. Find out why.
How long should I wait before introducing a new food to my baby?
Want to help your child become an adventurous eater, add spices and herbs to the baby food. Yes, really.
Here are great recipes to try from fruit purees, vegetable purees to a combination of fruits, veggies and meats.
Check out our top picks for bibs, spoons, highchairs, and plates/ trays.
Subscribe to Feeding My Kid’s Youtube Channel for our video series about how to best feed your baby, toddler, and school-aged child.
Share your comments below.
The information on this website is designed for educational and/or entertainment purposes only. The information provided is not intended to be a substitute for informed medical advice or care. Please consult a doctor with any questions or concerns regarding your child’s condition. You should not use this information to diagnose or treat any health problems or illnesses.